Slow Cooker Lamb Osso Buco

osso bucoby Karen Frazier

Several years ago, I came into possession of some cross-cut veal shanks, so I made Jim osso buco. He was immediately enamored, and it is one of his top requested meals. Of course, veal isn’t necessarily so easy to get where I live, but lamb is. Recently I picked up some pastured cross-cut lamb shanks, and I decided to adapt my osso buco recipe for the slow cooker, and for lamb. With an orange gremolata stirred in at the end, it’s really delicious.

Lamb Osso Buco

  • 4 pastured (grass fed) cross-cut lamb shanks
  • 1 onion, sliced
  • 2 large organic carrots, peeled and sliced
  • 4 cloves of garlic, sliced
  • 1 stalk of organic celery, sliced
  • 1 can (14 ounces) organic diced tomatoes, drained
  • Juice of 1/2 an orange
  • 3 sprigs of thyme
  • Sea salt and fresh cracked black pepper to taste
  • 1 bunch Italian parsley, washed, dried, and finely chopped
  • 3 cloves of garlic, finely chopped
  • Zest of one orange, finely grated
  1. In the crock of a slow cooker, combine lamb, onion, carrots, garlic, celery, tomatoes, orange juice, thyme, salt, and pepper. Cover and cook on low for 8 to 10 hours, or on high for 4 to 5 hours.
  2. After the osso buco is cooked, remove the lid and turn the slow cooker up to high. Allow to simmer, uncovered, for an additional 30 to 60 minutes to thicken the sauce.
  3. Meanwhile, combine the parsley, cloves, and orange zest with a pinch of sea salt. Stir into the osso buck just before serving.

photo credit: Micaiena via photopin cc

Caramelized Onions – In the Slow Cooker

caramelized onionsby Karen Frazier

Caramelized onions add a sweet umami flavor to any dish. Just a few of these delicious onions make the dishes to which you add them display deeper complexity and richness. Plus, they are just plain delicious, and they’re a great way to add flavor to ancestral recipes.

I use them to top burger patties and steaks. I puree them with faux mashed potatoes made from cauliflower or celeriac. I stir them into soups and stews. I puree them with other cooked veggies and stir them back into braising liquid to make a flavorful thick sauce or gravy. I fold them into omelets, cook them with chicken, mix them with pureed avocado for a creamy dip, and find dozens of other delicious uses for them.

So it stands to reason with that, with so many uses for caramelized onions, it makes cooking easier if I make them in bulk and freeze them. When I make a single serving of caramelized onions on the stovetop, it takes about 45 minutes, which isn’t realistic for busy weeknights. However, if I make them in bulk in the slow cooker and freeze them, they are really easy to incorporate in all kinds of delicious dishes.

Slow Cooker Caramelized Onions

  • 5 to 7 large yellow onions, peeled and thinly sliced (or however many fit in your slow cooker)
  • 3 tablespoons melted duck fat, lard, or your preferred fat
  • 1/2 teaspoon dried thyme
  • 1 teaspoon sea salt (or to taste)
  • 1/2 teaspoon fresh cracked black pepper
  1. Toss all ingredients together in a slow cooker to coat the onions.
  2. Cover the slow cooker and turn it on to low. Cook for about nine to ten hours, stirring occasionally, until the onions are soft and golden brown. Remove the lid and continue cooking the onions on low, stirring occasionally, for an additional one to two hours to allow excess liquid to evaporate.
  3. These will keep in the freezer for up to six months.

A note about the onions: The Environmental Working Group lists onions as one of its Clean 15, items that test only negligible amounts of pesticide residue. If I pick up onions at the farmers market, I buy them organic. Otherwise, I typically by conventionally grown onions at the grocery store.

One of my favorite cooking publications, Cooks Illustrated, recommends Spanish onions as the perfect caramelizing onion. I agree – if you can find them, try these. Otherwise, yellow onions are perfect. Sweet onions will make a very sweet caramelized onion, which may be a bit too much sweetness for some people. I prefer my caramelized onions on the more savory side with just a hint of sweetness, which is why I tend to use yellow onions or Spanish onions.

My favorite onions are cipollini, so I was excited to give those a try to caramelize. To my surprise they were almost aggressively savory – so just a few onions went a very long way.

photo credit: I Believe I Can Fry via photopin cc

Slow Cooker Bone Broth

by Karen Frazierbroth

Anemia has been a big problem for me in the last five years or so. Not the mild anemia that makes me a little tired, but severe, often debilitating anemia that makes me exhausted to walk down the hall from my bedroom to my living room. In the past several weeks, however, I’ve added mineral rich, nourishing bone broth as a food I eat daily. It seems to be helping.

I have my bone broth in the morning just like someone else would have a cup of coffee. It’s rich in minerals and gelatin. It’s also really helped with how I feel. My energy is up. My digestion is working better. And my hair and nails from the gelatin – wow are they in good shape.

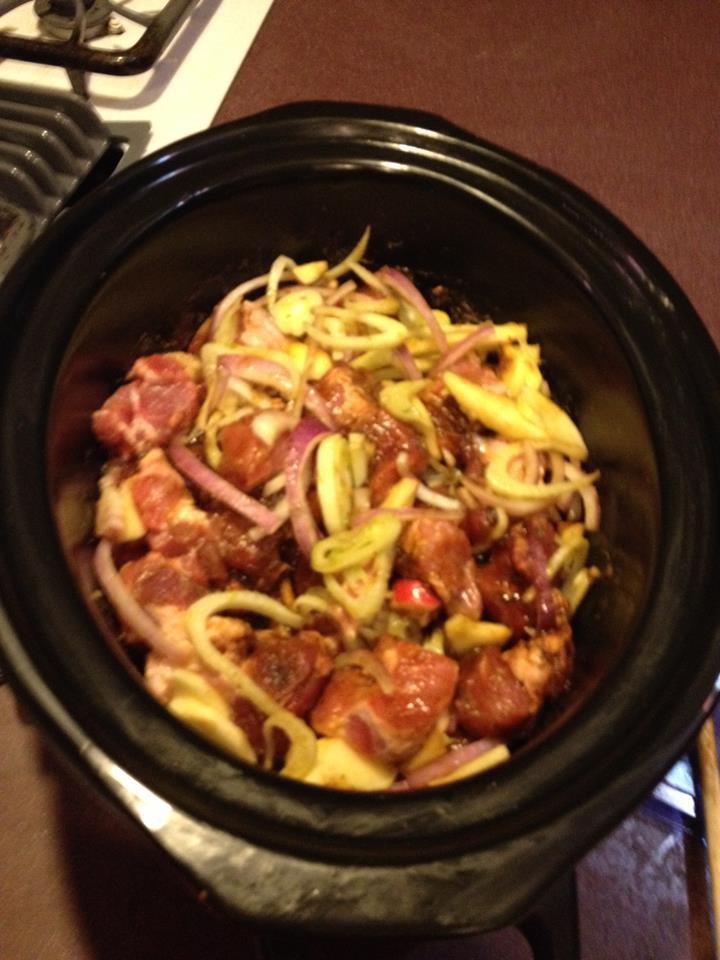
Many people are intimidated to make their own broth, but with a slow cooker, it’s really easy. I let mine simmer on the counter for 12 to 24 hours, extracting all of the good, rich mineral content from the bones. I use bones from organic, pastured animals, and I split them with a cleaver before sticking them in my slow cooker in order to make the mineral rich marrow more readily available to absorb into the broth as it simmers. I also add iron-rich parsley to bring even more iron to my healing brew.

My homemade broth serves as the base for or an ingredient in many of the foods I make. I use it to moisten stews, make gravies, create sauces, and make soup. Homemade broth adds delicious savoriness to your meals that is free of chemicals and artificial ingredients.

All About Bone Broth

So what goes into bone broth?

The bones: I use bones from pastured animals of all stripes. The bones can come from cooked foods (like a roasted  chicken carcass) or they can be raw. Sometimes I use chicken wings. I have beef marrow bones. I have beef knuckle bones. I save bones from whatever we eat. I have a baggie in the freezer full of bones. Whenever we have something with bones in it, I save the bones. I have a few ducks necks. I have some chicken feet, which add a wonderful gelatin to the broth. I have oxtails. While I get my pastured meat from local farmers and stores, I also order some of it from US Wellness Meats, which has high quality bones ready for your bone broth.

You can make your broth from a single source – like all beef or all chicken – or you can mix up bones from a variety of different animals. Just make sure you get some good cartilage bones in there like chicken feet, wings, or backs in order to up the gelatin content. Some people like to roast their bones ahead of time for additional flavor. This is especially true of beef bones, which get a delicious umami flavor when roasted.  Be sure to add some bones with some meat on them for even more flavor. When I use poultry wings, backs, or necks, I just toss them in meat and all. If you want to use the meat for something, rescue it from the bones after four or five hours of cooking and set it aside for use. Then, put the bones back in the stock to keep simmering.

The veggies: I’m a traditionalist in my veggie selections. I toss in an onion (usually cut into quarters or eights – you don’t have to peel it, and you can throw in the root ends), carrots, leeks if I’ve got them, and some celery. Occasionally I’ll throw in a few mushrooms, as well. If I’m feeling super fancy, I’ll add some organic dried shiitake mushrooms. I use all organic veggies, and I wash them thoroughly before putting them in the pot. You don’t need to cut them into tiny pieces. I just do a very rough chop (cutting carrots into three or four pieces each, same with celery). I always toss in a few celery leaves, as well.

One of the tricks I have for adding veggies to bone broth is this: I save my veggie trimmings from other cooking and freeze them in a large zipper bag. So I save onion peels, onion root ends, carrot root ends, celery tops, mushroom stems, etc. Then, I just dump them in my bone broth when I’m ready to make it.

The herbs and spices: You can use any herbs and spices you like in your broth. I prefer fresh herbs like rosemary, thyme, or sage. I just toss a few branches in there – I don’t bother to chop because they’ll be strained out later. I also add whole peppercorns, and a little bit of sea salt to the mix. I also add parsley for additional iron content. I usually add an entire bunch of organic parsley.

The liquid: I add just enough filtered water to cover the veggies/bones. I also add about a tablespoon of raw apple cider vinegar. This helps pull the minerals out of the bones. I actually let the water and vinegar soak with the bones for about an hour before I turn the slow cooker onto low.

Basic Bone Broth

  • Pastured organic bones and joints, a few containing meat
  • One or two organic onions, roughly chopped
  • Two organic carrots, roughly chopped
  • One organic celery rib, roughly chopped, with leaves
  • 1 sprig organic thyme
  • 1 sprig organic rosemary
  • 10 peppercorns
  • 1 bunch organic parsley
  • 1 to two tablespoons raw apple cider vinegar
  • Enough filtered water to cover the bones and vegetables
  1. Use a cleaver to split the bones open.
  2. Place all ingredients in the slow cooker. Add water just to cover the bones and vegetables.
  3. Cover the slow cooker and allow the stock to soak off heat for one hour.
  4. Turn on the slow cooker to low.
  5. Simmer on low for 12 to 24 hours. Poultry bones do better closer to 12 hours, beef bones 24.
  6. Strain the broth into a container, discarding any solids. Save the bones – you can reuse them until they go soft. Just freeze them in a zipper bag and pull them out the next time you make a broth.
  7. Chill the container, and then scrape any fat off the top before using the bone broth. The broth will turn to gelatin when chilled, which gives it wonderful body when you use it for soups and sauces.

This broth also is excellent in soups and stews – way better than anything commercially prepared. I always have a bunch frozen in individual containers in my freezer.
photo credit: paloetic via photopin cc

Wine and Horseradish Braised Short Ribs with Caramelized Onion Cauliflower Mash

short ribby Karen Frazier

Jim went to his cardiologist yesterday and got the go ahead for his primal diet. I was thrilled, because some doctors don’t like it that much. I’m glad to know my instincts were decent in this case. So tonight, I’m making use of my slow cooker and some grass fed, organic primal cut short ribs we picked up. I’m braising them in red wine and horseradish sauce, and turning the braising liquid into a gravy with which to top the cauliflower. I’m trying to give Jim non-primal flavors with a good health payoff.

There’s some controversy in the paleo world about red wine. Some people have it. Some don’t. If you know Jim and me, then you know we are wine enthusiasts. So I’m cooking with it tonight. It’s a sometimes thing instead of an every night indulgence now.

Jim has been so careful about following his diet that I wanted to make him something delicious, and I think this qualifies. Plus, I wanted to experiment with paleo gravy techniques.

Slow Cooker Wine and Horseradish Braised Short Ribs with Caramelized Onion Cauliflower Mash

For the short ribs:

  • 3 slices pastured sugar-free bacon (we get ours at US Wellness Meats), cut into pieces
  • 2 three-rib slabs of grass fed organic beef short ribs, cut into individual ribs
  • Sea salt and fresh cracked black pepper, to taste
  • 2 onions, sliced
  • 1 pound organic cremini mushrooms
  • 1 pound organic baby carrots or 4 large carrots, peeled and sliced
  • 2 sprigs organic fresh thyme
  • 2 sprigs organic fresh rosemary
  • 2 tablespoons organic prepared horseradish (or more to taste)
  • 2 cups dry red wine
  • 5 cloves garlic, finely minced or through a garlic press
  1. Season the ribs with sea salt and fresh cracked black pepper and place in the bottom of a slow cooker.
  2. Brown the bacon in a skillet over medium-high heat until the fat is rendered. Using a slotted spoon, put the bacon in the slow cooker. Set aside the bacon fat for the caramelized onions and cauliflower you’ll make later.
  3. Add the remaining ingredients to the slow cooker and stir. Cook, covered, on low for 8 to 10 hours or high for five hours.
  4. When the meat has cooked, remove it from the cooking liquid with tongs and set aside on a platter.
  5. Using a slotted spoon or skimmer, remove all of the vegetables from the cooking liquid and place them in a food processor. Remove the thyme and rosemary branches and throw them away.
  6. Leaving the top slot of the food processor open so steam can escape, puree the vegetables until smooth. Stir them back into the cooking liquid in the slow cooker until the liquid thickens.
  7. Return the meat to the cooking liquid and reduce heat to keep warm while you prepare the cauliflower.

For the cauliflower:

  • 2 tablespoons pastured bacon fat
  • 1 large onion, thinly sliced
  • 2 heads organic cauliflower, broken into small florets
  • 2 tablespoons of reserved bacon fat (or, if you’re not allergic to dairy like me, substitute pastured butter or another animal fat such as lard or duck fat)
  • Sea salt and fresh cracked black pepper, to taste
  1. In a large saute pan, heat the bacon fat over medium heat until it melts.
  2. Add the onions in a single layer in the pan. Reduce the heat to medium-low.
  3. Cook, stirring occasionally, until the onions are reduced and caramelized, about 45 minutes.
  4. In a large pot, cover the cauliflower with water. Cover the pot and set it on the stove to boil on high heat until the cauliflower is soft, 15 to 20 minutes.
  5. Drain the cauliflower well and allow it to sit in the colander for a few minutes to remove as much liquid as possible.
  6. Transfer the cauliflower and caramelized onions to the food processor. Add one to two tablespoons of butter, bacon fat, or some other fat. Process until smooth. Be sure to leave the top slot of the food processor open so the steam can escape.
  7. Season to taste with salt and pepper.

Now, serve the meat and gravy over the mashed cauliflower. Delicious, I promise!

A bit about my food processor warning. When I was a little kid, my mom was pureeing hot lentil soup in the food processor. It went boom and wound up all over the kitchen ceiling. My mom was lucky she didn’t get burned by the scalding hot soup.

When blending hot foods in a blender or food processor, steam build up can cause hot liquid and food to force its way out of the top of the processor. It can blow the lid clean off a blender. The best way to protect yourself is to open the chute at the top of the blender or food processor as you blend. Then, fold a towel several times and place it on top of the blender or processor. Place your hand on top of the towel to hold the lid in place. The towel will protect your hand. Finally, don’t stick your face right over the top of the open chute, just in case. Open the lid cautiously after blending hot  foods.

So – when I mentioned I was making mashed cauliflower on Facebook, I got some negative feedback about it. Apparently it’s a love it or hate it kind of food. I like it. With this, the caramelized onions really do mellow the flavor, and the bacon fat (if you use it) adds a lovely smokiness. Still – if you just can’t see yourself eating mashed cauliflower, consider another mashed paleo-friendly food such as celeriac or sweet potatoes.

photo credit: thebittenword.com via photopin cc

Rosemary and Chive Roasted Sweet Potatoes

sweet potatoesby Karen Frazier

For years, I thought I hated sweet potatoes. Of course, my only experience with them was the syrupy sweet candied Thanksgiving type, dripping in sugar, sweetness, and sometimes even marshmallows. Frequently, the sweet potatoes that wound up on the Thanksgiving dinner tables I frequented even came from a can. Blech.

As a result, I avoided them like the plague.

Then, a few years ago, I decided to try them again. I purchased fresh organic sweet potatoes at the local farmers market and decided to roast them. I was trepidatious, but I was ready to give them the old college try. They were delicious! I made them a few times for the family, and then promptly forgot about them.

Last night we had guests over for dinner. Jim and I eat very differently these days, usually consuming veggies and protein with a little fruit tossed in here and there, but with guests coming, I decided I wanted to add a starch so my guests didn’t leave feeling hungry and dissatisfied.

We mostly eschew starches around here, saving them as an occasional treat instead of standard fare. As a result, I no longer cook white potatoes, rice, quinoa, or any other grains that I would traditionally offer as a side dish. I toyed for a moment with offering our guests mashed cauliflower, but in the end, while I love that stuff, I couldn’t do that to my guests. They might find it weird.

Then I remembered sweet potatoes. While a bit starchy, sweet potatoes have a lot of fiber and nutrition in them, including vitamins A and C. Likewise, unlike white potatoes, sweet potatoes don’t contain saponins, which are anti-nutrients that may disrupt cell membranes in the body. Plus, they’re pretty darn tasty.

So, I roasted some organic sweet potatoes, cooked a lovely rib roast, sautéed some chanterelles, and made a nice salad. Dinner was delicious, and I especially enjoyed the sweet potatoes. Here’s the recipe.

Rosemary and Chive Roasted Sweet Potatoes

  • 2 sweet potatoes, cut into 3/4-inch dice (skin still on)
  • 2 sprigs of fresh rosemary, stems removed and chopped
  • 3 tablespoons chopped fresh chives
  • 3 cloves of garlic, finely minced
  • 2 tablespoons duck fat, melted (or grass-fed butter or any other fat you choose to use)
  • Sea salt and fresh cracked black pepper to taste
  1. Preheat your oven to 425 degrees Fahrenheit.
  2. In a medium-sized bowl, toss the sweet potatoes, rosemary, chives, garlic, duck fat, salt, and pepper until the potatoes are well-coated.
  3. Put the potatoes in a pan, forming a single layer along the bottom. I use a 9×13″ casserole dish.
  4. Roast the potatoes for about 25 to 30 minutes. Stir the potatoes and turn them over. Continue roasting until the potatoes are browned, about 25 to 30 minutes more.

photo credit: SaucyGlo via photopin cc

Country Style Spare Ribs with Apples, Cabbage, and Fennel

porkby Karen Frazier

Things are about to take a turn here at Recipes for My Kids. As you may have already noted, I often include gluten-free and dairy-free recipes because I have celiac disease and a casein allergy. While the kids were still at home, I went ahead and prepared their favorites that contained dairy and gluten anyway. The result was that I cross-contaminated myself frequently, and often wound up feeling very ill.

Now Tanner is off to college, and Kevin is only here one or two weekends per month. When Tanner left about a month ago for college, I realized it was the perfect time to turn my kitchen into a gluten-free, dairy-free mecca. I meticulously cleaned the entire kitchen, removing all traces of gluten or dairy that had accumulated in drawers and cupboards over the years. I purchased new gluten-free cookware and utensils. I designated a small counter and a single cupboard the spot for preparation of gluten-containing foods like sandwiches or toasts, and implemented very specific cleaning protocols so if someone made a gluten-containing food, it didn’t cross over into my pristine area. Even the freezer has a designated gluten area (the bottom shelf), and the kids have a refrigerator up in their room if they want to store some gluten-containing food when they are home.

As a result, I started feeling better than I had in years. With even the tiniest traces of gluten and dairy cross-contamination removed from my home, the years of symptoms I’d experienced such as exhaustion and digestive discomfort went away. Clearly I was on the right track.

With dairy and gluten grains off the table, my ultimate plan was to move in the direction of an ancestral style diet that didn’t contain any grains, processed foods, industrial seed oils, chemicals, processed sugar, or processed salt. My plan was to move into a more ancestral way of eating gradually. Then, about a week after Tanner left for school, Jim had a heart attack. I decided at that moment it was time to truly revamp his diet and mine in order to protect his heart health in the future.

Today, just four weeks later, my kitchen is a very different place. I cook every meal from scratch – all aspects of it – and I make it without grains, processed foods, or industrial seed oils. Jim has already lost 15 pounds in about two weeks, and his health is the best I have seen it in quite some time. We’re lucky because his heart attack was very mild. It served as a wake-up call to both of us.

Because I’m cooking so much, I’ve come up with a few strategies to give myself a break so I’m not in the kitchen constantly. For example, I typically make enough in each meal so that we get two dinners out of it, as well as something for the freezer. That way, on nights I don’t feel like cooking, I’ve got food in the freezer that can easily be thawed and reheated.

I’m also using my slow cooker. A lot. When it’s not in use cooking meals, I’ve got it simmering with a bone broth or stock to use in recipes. To make the stocks, I use bones and trimmings from meat, carrots, onions, celery, garlic, and herbs. I simmer it for 12 to 24 hours depending on the type of bones and freeze it so I have it on hand whenever I want to make a quick soup.

So – this is a very long way of saying this. You’ll notice things changing here on the blog. All recipes from this point forward (unless I’m getting in the way back machine and pulling out a favorite recipe from the past) are both gluten-free and dairy-free. More likely than not, they’ll also be grain-free and contain lots of healthy plant foods and pastured ingredients. Some may call it paleo. Some may call it primal. But I just call it delicious. So here’s the first paleo recipe. Enjoy!

Country Style Spare Ribs with Apples, Cabbage, and Fennel

  • 2 sweet tart organic apples (such as honey crisp), peeled, cored, and sliced
  • 1 organic fennel bulb, thinly sliced
  • 1 red onion, thinly sliced
  • 3 cloves garlic, minced
  • 1/4 cup raw apple cider vinegar
  • 1/4 cup chicken stock
  • 1/2 teaspoon cinnamon
  • 1 sprig thyme
  • Dash cayenne
  • 2 pounds pastured country style pork spare ribs
  • Sea salt and fresh cracked black pepper to taste
  • 1 small green organic cabbage, cut into small pieces
  1. In a large slow cooker, combine the apples, fennel, onion, garlic, apple cider vinegar, chicken stock, cinnamon, thyme, and cayenne. Stir to combine.
  2. Season the pork with sea salt and fresh cracked black pepper. Add to the slow cooker and stir to combine with the vegetables and apples.
  3. Cover and cook on low for 8 to ten hours, or on high for five hours.
  4. An hour before serving, stir in the cabbage. Cover and continue to cook on low for an additional hour.