Lebanese Garlic Chicken Thighs and Warm Spinach Salad

img_2619by Karen Frazier

I’m on day 22 of my Whole30 30-day challenge, and I’ve been tinkering in the kitchen. Yesterday, I decided to make Lebanese garlic sauce. Today, I decided to spread it on chicken thighs. The result? Delicious!

The recipe is Whole30 approved when you use sugar-free bacon (I like it from US Wellness Meats), as well as paleo and low-carb.

Lebanese Garlic Sauce

Makes about 2 1/2 cups

  • 1/2 cup peeled garlic cloves
  • 1 teaspoon sea salt
  • 2 cups EVOO
  • Juice of 3 lemons
  • 1/4 teaspoon freshly cracked black pepper
  1. In a food processor or blender, combine the garlic cloves and sea salt. Blend, scraping down the sides occasionally, until the garlic cloves make a fine paste.
  2. Add the EVOO in a very thin stream with the food processor still running until it is completely incorporated. This step will take about 10 minutes.
  3. Add the lemon juice and pepper. Blend briefly to mix.

This has pretty good kick, but you can taste and adjust by adding more olive oil or lemon juice to suit your own taste buds, which is what I do. Even after I’ve added the lemon juice, I add extra olive oil, just making sure it goes in a thin stream. This will store in your fridge, tightly sealed, for a few weeks. If you prefer a more neutrally flavored oil, you can use another expeller pressed oil, such as avocado oil, or use half avocado oil and half EVOO. I like the California Olive Ranch everyday EVOO, which has a mild flavor.

Lebanese Garlic Chicken Thighs

Serves 4

  • 8 whole chicken thighs
  • 1/2 teaspoon sea salt
  • 1/4 teaspoon freshly ground black pepper
  • 8 tablespoons Lebanese garlic sauce
  1. Preheat your oven to 350 degrees Fahrenheit.
  2. Place the chicken thighs, skin side up, in a large baking or roasting pan and sprinkle them with the sea salt and black pepper.
  3. Spread each with one tablespoon (or more) of the Lebanese garlic sauce.
  4. Bake in the preheated oven for 70 minutes, or until the chicken is cooked through.

I like to make enough for two meals – my motto is cook once and eat twice. It’s a great time saver.

Warm Spinach Salad

Serves 4

  • 6 slices sugar-free bacon, chopped
  • 1 shallot, finely chopped
  • 1/2 teaspoon sea salt
  • 1/8 teaspoon freshly cracked black pepper
  • Juice of half an orange
  • 1/4 cup white wine vinegar, red wine vinegar, or champagne vinegar
  • 10 ounces baby spinach
  1. In a medium saute pan on medium-high heat, brown the bacon until all the fat is rendered. Remove the bacon from the fat in the pan with a slotted spoon and set it aside.
  2. Add the shallot to the fat in the pan along with the salt and pepper. Cook, stirring, for one minute.
  3. Add the orange juice and vinegar. Cook, stirring occasionally, until the liquid is reduced by half, three or four minutes.
  4. In a large bowl, combine the spinach and the bacon. Toss with the warm vinaigrette and serve immediately.


8 Pasta Hacks for the Paleo or Low-Carb Foodie

zucchini-lasagna

You don’t have to limit yourself to zucchini lasagna.  Photo credit sexyliciousness via photopin.

by Karen Frazier

When I tell people I have celiac disease and can’t eat gluten, and that I further choose to eat low-carb paleo to help health conditions and keep my weight in check, one of the most common reactions I get is this one: “I could NEVER give up pasta!”

I get it – I truly do. Back in the day, I loved pasta. It was cheap, versatile, delicious, and easy way to get totally creative in the kitchen. Sadly, I love pasta, but it doesn’t love me even a little bit.

Since I eat mostly low-carb paleo, pasta is a thing of the past for me. I can’t eat gluten-free pasta substitutes (often made from corn flour, rice flour, or a combination of various legume-based flours). But I still enjoy a tasty pasta-style dish from time to time, such as my low-carb paleo lemon and artichoke shrimp scampi on zoodles.

With years of low-carb and paleo experience under my belt in a household of picky eaters, here are some of my best low-carb and/or paleo pasta hacks.

paderno1. Spiralize “Zoodles” and Other Veggie Noodles.

If you’re not new to the paleo world, chances are you’ve made a batch of zoodles – or another kind of veggie noodles – in your day. In fact, I’ve written an entire cookbook about making noodles out of veggies using a handy little gadget called a spiralizer. I use the Paderno World Spiralizer, and all you’ve got to do is crank the handle to get super cool “noodles” that make a great stand-in for pasta if you’ve either chosen or been forced into a gluten-free lifestyle. Try it, you’ll like it.

2. Make Veggie Peeler Noodles.

julienne-peeler

Dual veggie and julienne peeler from Precision Kitchenware

Limited shelf-space or no room in the budget for yet another gadget – or both? No worries. If you’ve got a veggie peeler and a knife, then dang it, you’ve got oodles of zoodles and other veggie noodles. It’s pretty easy. Use a veggie peeler to cut the vegtables into ribbons. Then, either leave wide ribbon style veggie pasta, or use a paring knife to cut the noodles into smaller shapes.

You can also try a julienne peeler, which will cut the veggies into angel-hair like strips. No need to clutter your drawers with both, however. Many manufacturers make peelers that do double duty, working as both a veggie and julienne peeler. Clever!

3. Choose Veggies That Noodle.

That’s right. Noodle is a verb. Of course, not all veggies are created equal when it comes to noodling around. Some veggies make much better noodles than others. Try noodling:

  • Zucchini and other summer squash (peeled or unpeeled)
  • Sweet potato
  • Winter squash
  • Carrots
  • Parsnips
  • Beets
  • Other solid root veggies

To cook the veggie noodles, I recommend sautéing them in your fat of choice, sprinkled with a little salt, for two to five minutes, until they are al dente.

spaghetti-squash4. Use The Aptly Named Spaghetti Squash.

So what if you abhor kitchen gadgets of all kinds (I can’t imagine anyone not loving a kitchen gadget, but that’s just me, owner of a Ginsu knife that supposedly can hack through an aluminum can in one clean slice), so making fancy noodles is out? If you have an oven, a baking sheet, a fork, and a sharp knife, you can still make veggie noodles from spaghetti squash.

  1. Preheat your oven to 400 degrees Fahrenheit.
  2. Cut the squash in half lengthwise.
  3. Place it cut-side down on a baking sheet and bake it in the preheated oven until it is tender, 30 to 45 minutes.
  4. Remove it from the oven. Use a fork to pull the flesh away from the rind in “noodles” and go forth with whatever sauce sounds tasty to you.

5. But What About Lasagna and Stuffed Pasta Dishes?

salamiI’m so glad you asked. Of course, you can use thinly sliced eggplant or zucchini as your lasagna noodles or as a pasta to wrap around filling. Here are some tips:

  • Use a mandoline for paper-thin slices.
  • I recommend if you do this, you place the thin slices of veggies in a colander in the sink and salt them. Then, after about 30 minutes, wipe away the salt completely and use the veggies. The salt will draw off excess water so you won’t wind up with a watery dish. Go forth and make your lasagna or stuffed pasta.

6. But What if I Can’t Stomach Another Noodle Made From Veggies?

Here’s the thing. It’s okay to be super sick of veggie noodles and you want something a little different. In this case, I offer a tried and true idea from the Frazier household to yours that will change the way you make low-carb lasagna. Use thin slices of salami as your noodles. I’ll allow a moment for the genius of this idea to sink in before I continue. Salame. Thinly sliced (or another deli-sliced meat you like). Use it as your noodle layers or wrap it around a filling. Of course, you could also use large pieces of kale or spinach, but doesn’t using pre-sliced salami, crisp cooked slices of bacon or pancetta, or some lovely Canadian bacon sound somehow much tastier?

This is one of my favorite low-carb maxims – when in doubt, wrap it in meat, baby! You’re welcome!

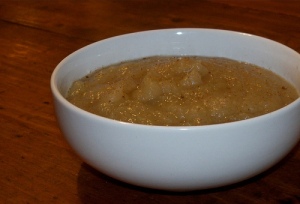
7. Whip Up a Truly Great Tomato Sauce.

A good tomato sauce is shockingly easy. It takes a bit of time, of course, but most of that is time you can spend reading a book as the sauce simmers to allow the flavors to blend. Here’s my super easy and tasty tomato sauce.

  • 2 tablespoons fat of your choice
  • 1 onion, finely chopped
  • 6 garlic cloves, minced
  • 1 teaspoon dried oregano (or Italian seasoning blend)
  • 2 (15-ounce) cans crushed organic tomatoes (I love Muir Glen, which has no sugar added), drained
  • 1/2 teaspoon sea salt
  • Pinch red pepper flakes
  • 1/4 cup chopped, fresh basil
  1. In a large saucepan, heat the fat on medium-high until it shimmers.
  2. Add the onion and cook, stirring occasionally, until the onions begin to brown, about five minutes.
  3. Add the garlic and oregano and cook, stirring constantly, until it is fragrant, about 30 seconds.
  4. Add the tomatoes, salt, and red pepper flakes. Simmer on low, stirring occasionally, until the sauce is the desired consistency and the flavors are blended, 30 to 45 minutes.
  5. Stir in the basil.

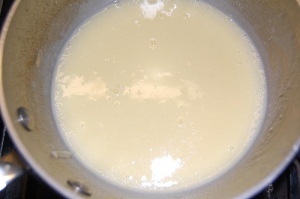
8. Make a Tasty Low-Carb White (Béchamel) Sauce.

Béchamel, Alfredo, and other white pasta sauces usually start with a roux of butter and flour, so they tend to a) have gluten; and b) be a bit carby. This low-carb, gluten-free version isn’t paleo unless you include grass-fed, organic dairy as part of your paleo repertoire, but it’s really, really tasty either as a sauce by itself on one of your pasta substitutes, or combined with other meats and veggies, like chicken and broccoli or ham, spinach, and mushroom.

  • 1/4 cup grass-fed unsalted butter
  • 8 ounces grass-fed cream cheese
  • 1/4 cup grass-fed heavy cream
  • 1 cup grated grass-fed parmesan or asiago cheese
  1. In a medium pot, combine all the ingredients.
  2. Cook on medium-low, stirring constantly, until all the components are melted, and the sauce is well combined and smooth.

Pasta on, my Friends!

These are a few of my favorite ways to keep pasta-like dishes in my life. Combine your creativity with these tricks, and you won’t miss pasta a bit.


Sauces: Pan Sauce and Beurre Blanc

Flickr creative commons license by jeffreyw

Want to elevate your cooking? If you’re mostly a basic cook but want to find simple ways to make your cooking even better, then I’ve got a single word for you: sauce. Sauces are great ways to add flavors to your foods.

If you were all budding chefs studying cooking in depth, I’d go into detail here about the mother sauces: there are five (or six – depending on who you ask) including:

  • Velouté – A stock-based white sauce.
  • Béchamel – A flour, milk, and butter white sauce.
  • Espagnole – A rich brown sauce
  • Hollandaise/Mayonnaise – An egg yolk and fat emulsion
  • Vinaigrette – 1 part vinegar, 3 parts oil, and other herbs/spices
  • Tomato

From these sauces, many others are born. For example, if you add tarragon to hollandaise, you get béarnaise. If you add some gruyere to béchamel, you’ve got a great topping for mac n cheese or scalloped potatoes.

That’s really all I am going to say about the mother sauces today. Instead, I’m going to talk about some simple sauces you can make to add flavor to cooked meats. So, instead of having a plain steak, you could have steak with a wonderful port wine sauce. Instead of a plain piece of fish, you could have halibut topped with a delicate beurre blanc.

Pan Sauces

What we’re really talking about are pan sauces, and here’s what I like about them. Once you’ve cooked your protein in a pan, you can use the drippings in the pan to make a really fantastic pan sauce. To make a pan sauce.

  1. Remove the meat from the pan and set it aside, tented with foil. I like to cook many of my proteins in an ovenproof saute pan just so I can then use it to make a fabulous sauce.
  2. Put the pan over medium high heat on the stove top. If you’ve cooked some really fatty piece of meat, you may want to remove some of the clear fat from the pan before you do so.
  3. Add some aromatics such as shallots, onions or garlic and saute in a little oil leftover from cooking.
  4. Add an acidic liquid or alcohol to the pan such as vinegar, lemon juice, white or red wine, etc. As you add this to the pan, scrape up all of those amazingly flavored brown bits to incorporate them in the sauce.
  5. Toss in some chopped herbs. Let the sauce simmer on the stove for a bit to reduce by about 50 to 75 percent.
  6. Once the liquid has reduced, add about 1/4 to 1/2 cup of very cold unsalted butter, cut into small pieces. I add the butter a piece at a time, whisking it to emulsify. This will thicken your sauce and add richness.
  7. Taste your sauce and adjust seasoning as necessary.
  8. Serve immediately over your protein.

Beurre Blanc

This is one of my favorite sauces for seafood. I particularly like it over seared sea scallops. It has a delicate yet delicious flavor that really enhances the sweetness of the scallops.

  • 1/2 cup dry white wine
  • 1/2 cup white wine vinegar (or champagne vinegar, sherry vinegar)
  • 1 small shallot, minced
  • 3 sticks unsalted butter, cut into 1″ pieces and chilled until very cold
  • Salt and white pepper to taste
  1. Simmer shallots, wine, and vinegar in a saute pan, cooking until liquid has reduced by about 80 percent.
  2. Remove the pan from the heat momentarily, whisking two pieces of butter (one at a time) into the pan.
  3. Return the pan to low heat and continue whisking butter in a piece or two at a time until it is completely incorporated.
  4. Taste and season. Serve immediately.
  5. You can change the flavors in this by adding herbs such as basil or by adding a little citrus zest.

Roasted Poultry Stock

stockHow to Make Roasted Poultry Stock

  1. Preheat your oven to 450.
  2. Arrange about four pounds of turkey and chicken wings in a roasting pan in a single layer, and roast for one hour.
  3. Remove the poultry from the pan and add one cup of water to the pan, scraping to remove all of the flavorful browned bits from the bottom.
  4. In a large stockpot, saute two ribs of celery, two carrots, and two onions roughly chopped in a few tablespoons of oil until tender. Add poultry, water from roasting pan, and about one gallon of water to the pot and bring to a simmer.
  5. Meanwhile, wrap 1/2 teaspoon of peppercorns, several sprigs of parsley, several sage leaves, two bay leaves, and several sprigs of fresh thyme in cheesecloth and tie with kitchen twine. Drop it in the simmering water.
  6. Simmer, uncovered, for three hours. Allow to cool and strain out solids. Store in the refrigerator in a tightly sealed container.

You can use homemade stock in gravy, soups, sauces, and stews. It has much better flavor than canned broths.

Ginger Maple Applesauce

Homemade ApplesauceYesterday was the perfect fall morning at the Olympia farmers’ market. There was a crisp chill in the air, which significantly reduced crowd size. Still, given the offerings available this time of year at the market, the chill was worth it. Along with a dizzying array of organic apples from Washington’s bumper apple crops, there were large ears of corn, juicy plums, chanterelles, squash, pole beans, red and white raspberries, concord grapes, and many others. One of my favorite types of produce from fall in Washington State is pluots. A cross between a plum and an apricot, the pluot is like a juicy, sweet plum. If you come across these tasty stone fruit, give them a try. I think you’ll love them.

As far as I am concerned, however, the star of the show for fall is apples. I love apple season with a passion approaching my love for writing. In fact, as soon as the days grow shorter and the leaves start to change color, I begin cooking with apples. The dogs love it. They gather at my feet as I peel and chop, accepting tiny slices of apple they chew with great gusto. (Tip – never give your pets apple seeds, which contain traces of cyanide.) At the market yesterday, the variety was amazing. Braeburn, Fuji, Jazz, Lady Alice, Gravenstein, Pink Lady, Rose, Honeycrisp…it’s an apple lovers paradise.

I enjoy baking apple pies, crisps, cakes, and turnovers. I also like making a simple applesauce, which I will be making today from the organic Honeycrisp, Pink Lady, and Jazz apples I bought yesterday.

When cooking with apples, I take a minimalist approach. I like to let the flavors of the fruit shine through. This doesn’t mean lots of sugar or heavy spices. Instead I use just enough to enhance the natural flavors of the apples instead of overpowering them.  Some of my favorite spices to use include fresh grated nutmeg, cinnamon, allspice, cloves, and fresh grated ginger. I also usually use just a touch of lemon zest and lemon juice to prevent the apples from turning brown and bring out the tart notes.

Another trick for baking with apples is using a few different varieties in one dish. For instance, in my pies I often mix Granny Smith and Pink Lady apples. In fact, Pink Lady apples are my favorite eating and baking apples, followed closely by Honeycrisp.

Today, I will be making a simple applesauce. Recipe below.

Ginger Maple Applesauce

  • 4 Pink Lady apples – Peeled, cored, and chopped
  • 4 Honeycrisp apples,  peeled, cored, and chopped
  • 4 Jazz apples, peeled, cored, and chopped
  • 1 cup water
  • 1/2 cup pure maple syrup
  • 2 T. fresh ginger root, grated
  1. Place apples and water in a large pot and simmer on the stove top, covered until apples begin to break down, about 15 to 20 minutes.
  2. Remove from heat and stir, mashing apples together.
  3. Stir in ginger root and maple syrup.
  4. If you prefer a smooth applesauce instead of a rustic one, cool and process in a food processor or food mill.

Homemade Mayo – How to Make it and Why You Should

mayoIf you’ve ever looked at the ingredients on the back of a commercial mayonnaise, you might be surprised to find chemicals, preservatives, and high-fructose corn syrup (HCFS). In fact, “light” mayonnaise that contains lower amounts of fat often incorporates an array of surprising ingredients your great grandmother wouldn’t have even recognized as food. From commercial mayonnaise, here are a few ingredients on the label: CALCIUM DISODIUM EDTA, SUGAR, HCFS, NATURAL AND ARTIFICIAL FLAVORS.

While I receive kind of scary letters from the corn growers PR people when I mention HCFS in an article or blog post, I feel I must here. HCFS is an artificial sweetener made from fructose and sucrose. It has been linked to the growing obesity problem, and it is always best to limit all forms of sugar, including HCFS. Some experts believe HCFS is even more responsible for obesity than table sugar because of the way your body processes it, and some evidence suggests it contributes to liver scarring and cirrhosis. As with everything, the key is moderation. Unfortunately, because HCFS (more recently called corn sugar, but don’t let the new label fool you. It’s still HCFS.) is so ubiquitous in processed foods due to how cheaply it is produced and how plentiful it is, the negative health effects may prove to be exponential.

Homemade mayonnaise, however, contains only a few natural ingredients that just about everyone recognizes as something you can eat: egg yolks, oil, acid (lemon juice or vinegar typically), and salt. If you’d like to flavor it, you can add chopped fresh herbs, citrus zest, minced fresh garlic, or chipotle. Making it is an easy process. You can use your blender, a whisk, or a food processor. I’m going to describe the food processor method here, although it is easy to adapt for any equipment once you know the process.

Homemade Mayo

Ingredients:

  • Yolk of one egg
  • 1 tablespoon plus 2 teaspoons acid (lemon juice, lime juice, red wine vinegar, white vinegar, etc.)
  • 1 cup of oil (macadamia, olive oil, avocado oil)
  • Pinch to 1/2 teaspoon of salt

Method:

  1. Place egg, acid, and salt in the bowl of a food processor. Process a few seconds to combine.
  2. Your food processor should have a tube in the feed chute you use to push vegetables in. In the removable circular tube in the middle, there should be a small hole in the bottom. Fit the tube into the feed chute, and turn on the food processor. Pour a few drips of oil in the tube with the processor running. When that oil has been incorporated in the mayonnaise, pour a little more. Next, fill the tube with the oil and let it run in a slow stream into the egg mixture as the processor continues to run, until you have incorporated all of the oil.
  3. That’s it. Making mayonnaise is quite simple, and the homemade product tastes fresh and delicious. If you do not have the round feed tube with the small hole in the bottom, or if you are using a whisk, then you need to begin incorporating the oil very slowly while whisking constantly. Start with a drop or two of oil, add another drop or two, and then begin to add the oil in a very thin, slow stream while whisking constantly. If you add the oil too quickly, the mayonnaise will fail to emulsify.

Variations

  • Chipotle-lime mayonnaise: Replace at least 2 teaspoons of acid with fresh squeezed lime, add 1/2 tsp of lime zest, and a dash of dried chipotle.
  • Lemon-basil mayonnaise: Replace 2 teaspoons of acid with lemon and add 1/2 tsp of lemon zest. Roughly chop seven a small bunch of fresh basil and process it with the mayonnaise at the end to blend.
  • Garlic mayonnaise: Use red wine vinegar for your acid, and add the full 1/2 tsp of salt.Take one to two cloves of fresh garlic and put them through a garlic press. Put them in with the egg mixture and pulse the food processor to blend. Proceed to add your oil as instructed.

Tips

  • Mayonnaise will keep up to one week when tightly covered and refrigerated.
  • Use the freshest eggs possible.
  • You can use whole eggs, which creates a lighter, less creamy mayonnaise. You may need to adjust your oil slightly, so keep an eye as you process to determine when it is done.
  • If your mayonnaise fails to emulsify the first time you try it (and occasionally I still have a batch go awry), try it again, adding the oil just a little bit more slowly and making sure you do not stop whisking or processing as your incorporate it.
  • You can incorporate other oils such as extra-virgin olive oil or walnut oil; however, remember they are very intensely flavored. If you do use these oils, I suggest only adding a few tablespoons to 1/4 cup of them in order to avoid overpowering the mayonnaise.

Getting creative with the acids you use will change the flavor and character of your mayonnaise.

Pesto

pestoToday is CSA day. For those of you who don’t know, CSA stands for community supported agriculture. Many organic farms in local communities offer members the opportunity to purchase a share in the farm. This can run anywhere from about $400 for a season to $1,000. Then, once growing season starts, the farm supplies you with a box of freshly picked vegetables every week.

This is my first year trying community supported agriculture. I like the idea of keeping my money in my community and receiving fresh, organic vegetables that haven’t traveled hundreds of miles before they make it to my kitchen. Very few foods taste better than a fresh vegetable picked at its peak of ripeness.

Having a CSA delivery every week has changed the way I cook this summer. I used to plan my meals and then go to the store to get what I needed to cook them. Now, I wait for my CSA box and then plan my meals around what is in them. Since Tuesday is CSA delivery day, I will see what treasures arrive today and then create simple meals. Last night I used the last of my previous week’s CSA, making a seafood chowder with red potatoes, fresh carrots, and local seafood.

Scapes

My first CSA box contained scapes. While they look like octopus tentacles, scapes are actually the green tops of garlic bulbs that rise above the ground as the bulb develops. They have a subtle garlicky flavor and make a fantastic seasoning. You can chop them and use them to season foods such as oven-roasted potatoes, or you can create a terrific pesto.

Pesto

Pesto is a simple, fresh sauce that is easy to make. All it requires are herbs, virgin olive oil, nuts, hard cheese, and garlic. The traditional pesto contains basil, olive oil, pine nuts, parmesan cheese, and garlic. Pulse the ingredients in a food processor and voila, pesto. To make it, use two tablespoons of oil, 3/4 cup of grated cheese, 1/4 cup of pine nuts, three cloves of garlic and a small bunch of basil. You can also hand chop the ingredients and mix them together. If you do use the food processor, pulse it a few times to chop but not homogenize your ingredients.

That’s it. Use your basic pesto to top warm pasta, jazz up eggs, or as a sauce for grilled chicken or fish. Your only limit is your creativity. You can also replace any ingredient with something else. Consider this: arugula and walnuts in place of pine nuts and basil. It’s up to you, and it’s so easy to do.

Want to make scape pesto? Use scapes, parmesan, toasted slivered almonds, olive oil, and a touch of sea salt.

Pair pesto dishes with a nice unoaked white wine, such as a Sauvignon Blanc or a dry Riesling. Try the 2010 Airfield Yakima Valley Sauvignon Blanc for just $13 per bottle, or a Chateau Ste. Michelle Columbia Valley Riesling Cold Creek Vineyard for around $15.